You can manually move account content to a new account yourself. Here are the circumstances where it’s best to do a manual move:
- If you have not started to collect data and the account you want to be moved just has inactive surveys.
- If you have collected data in the past and do not plan on reopening the surveys, but want the surveys and data in your new account.
- You only want to move a few surveys, not hundreds.
- On emailed surveys, you’re okay losing distribution names, history, and the ability to send thank you and reminder emails.
NOTE: The following directions explain exporting your surveys and their data. This can also be a great method for backing up your surveys in general.
Step-By-Step Directions
Moving Surveys
First, the survey itself, without the data, has to be moved. Feel free to skip steps 3-7 if you did not email the survey to your respondents or chose to anonymize the data.
- Log into your old account (https://shusurvey.sacredheart.edu).
- Navigate to the survey you want to move.
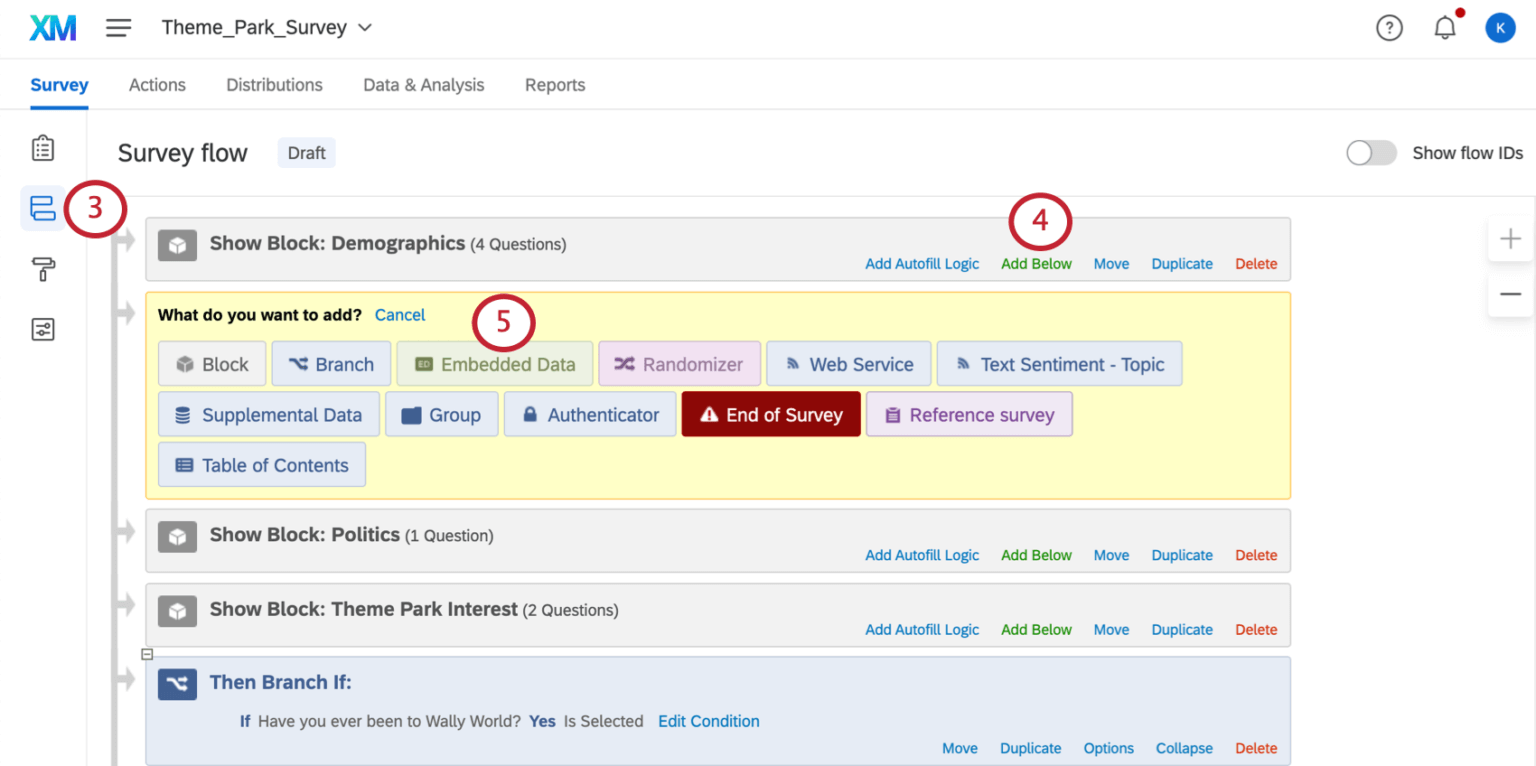
- Go to the Survey Flow.

- Click Add Below.
- Select Embedded Data.
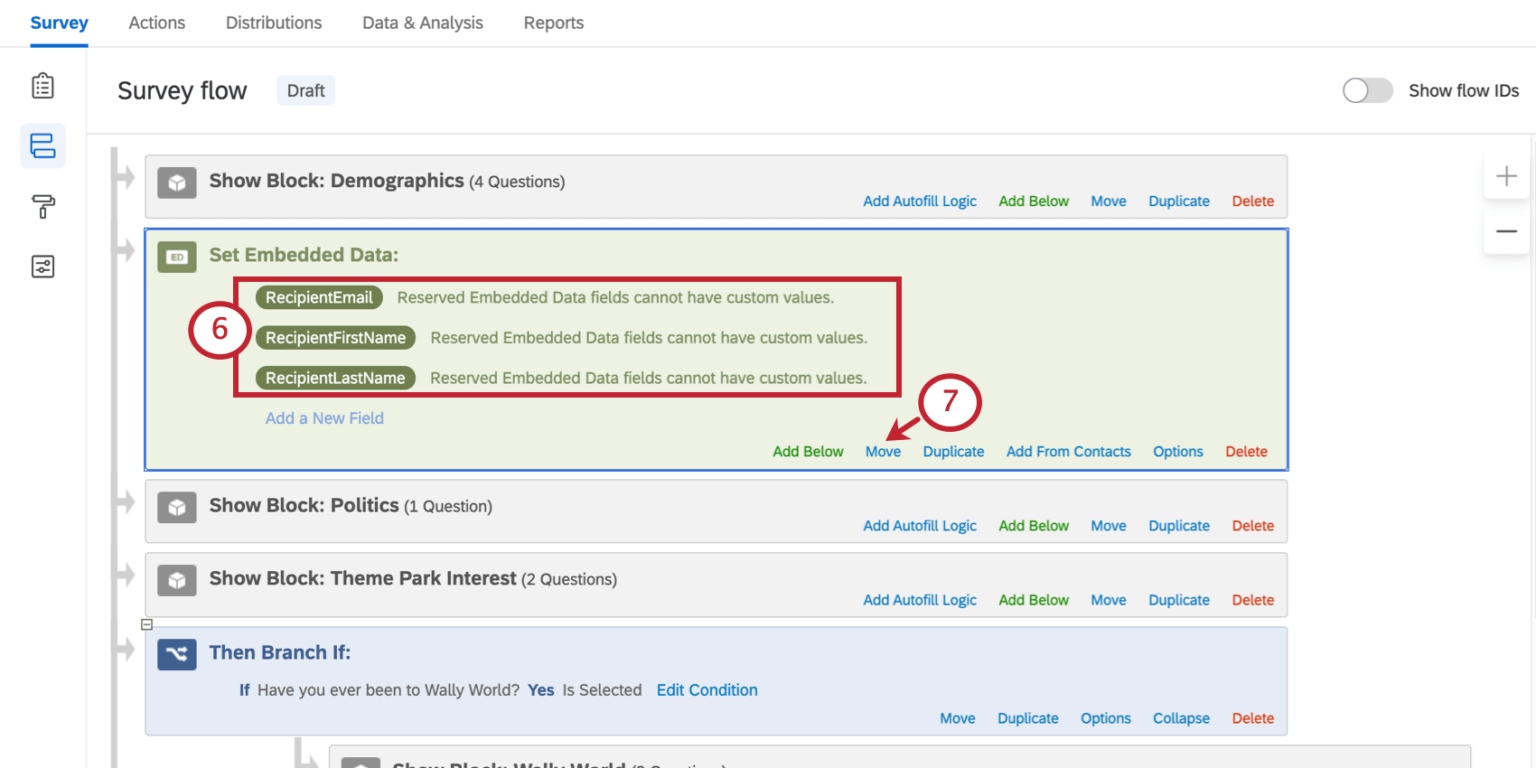
- Click Add a New Field and create fields named RecipientEmail, RecipientFirstName, and RecipientLastName.

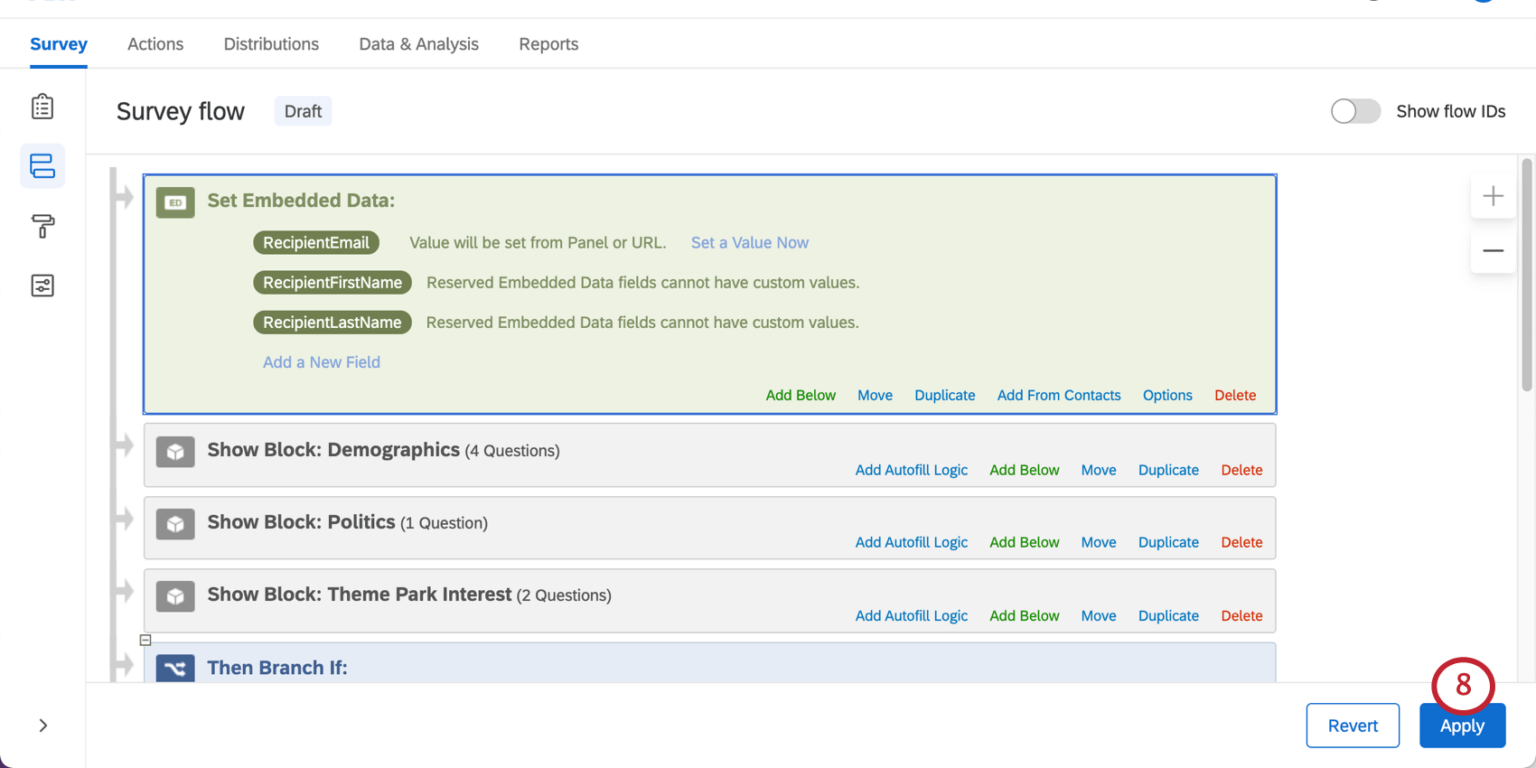
- Click Move to drag the embedded data element to the top of the survey flow.
- Apply the changes.

- Export the survey as a QSF file.
- Log into your new account (https://qualtrics.sacredheart.edu).
- Create a new survey from your QSF file.
Moving Data
Next, you have to move the data itself over.
Warning: Make sure you followed steps 3-7 if you emailed the survey and want the names and emails to be saved with the data!
- Log into your old account (https://shusurvey.sacredheart.edu).
- Go to the survey you want to export data from.
- Export the data.
- Log into your new account (https://qualtrics.sacredheart.edu).
- Import the data into the new copy of the survey.
Moving Contact Lists
Warning: Even when you move contact lists over, surveys’ distribution information will not be carried over. If you need distributions to remain connected to their surveys,
- Log into your old account (https://shusurvey.sacredheart.edu).
- Find the contact list you want to copy over.
- Go to List Options and select Export List. Save your list as a CSV or TSV.
- Log into your new account (https://qualtrics.sacredheart.edu).
- Navigate to the Create Contacts page.
- Import the contacts from the file you saved earlier.